
15 Architectural Photography Tips (for Beginners)
What makes an amazing photograph?
Do you wish to take your architectural photography skills to the next level?
There is an astounding array of photographic niches that, on their own, cover complex distinctions, including portrait, landscape, wildlife, aerial, abstract, macro, and of course, architecture photography.
Elevating your photos to jaw-dropping status is not an easy pursuit but a worthwhile one. Get started by taking heed of some useful photography tips – architecture edition.
1. Consider the Subcategories
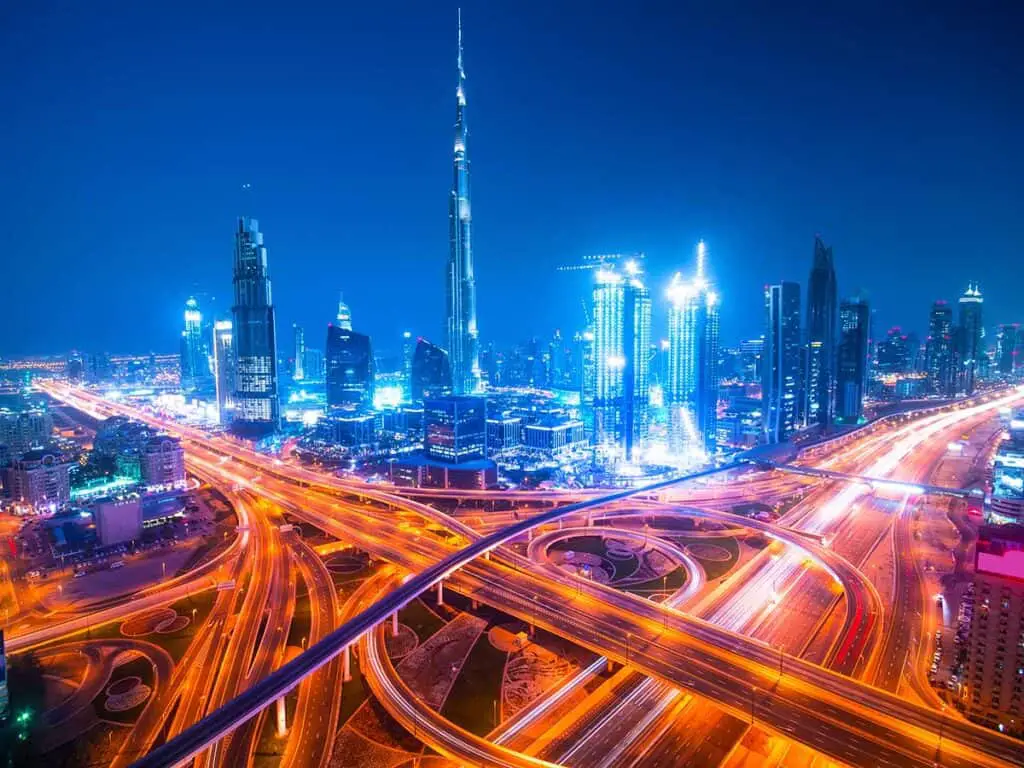
Architecture photography is a subset of photography, but it is a subset so broad it has its own subsets.
There is landscape architecture photography, in which a structure works in tandem with the land around it. There is urban architecture photography, in which the subject building could be a synecdoche for the soul of a metropolis. There is interior photography, which is self-explanatory.
The list goes on.
Depending on which subcategory you wish to zero in on for a shot, the focus of your photograph’s message may change.
2. Determine the Theme You Wish to Convey
All great photographs convey a theme of some sort, usually associated with a plethora of moods.
Take some time to pick a word that you feel encapsulates what you are trying to capture in a photograph. It could be desolation, hope, loneliness, celebration, or anything else you can think of.
In photography, lighting is one of the chief elements of mood, so the theme of your photography may help you determine what time of day (if you have the flexibility) to set out.
Most importantly, you want to consider the subject. That is the architecture itself. For example, if you are going to convey hope, your subject might be a newly constructed school taken beneath the light of sunrise.
The possibilities are vast.
3. Highlight the Buildings’ Natural Characteristics
As an architecture photographer, your job is essentially to re-render somebody else’s art into your piece.
Examine the structure with the eyes of an art critic – what are the characteristics, functions, and styles?
Is the building quaint or dominating?
Is it a place of leisure or a place of work?
Make these observations, and you make your job as a photographer significantly easier.
As a beginner photographer, you do not want to juxtapose a rustic inn’s leisure and easiness with harsh, mid-day lighting beating down on it while cars of working people during lunch rush whoosh past. You certainly can, but don’t expect it to put viewers at ease.
4. Consider the Angle
In consideration of highlighting a structure’s natural characteristics rather than going against them, you want to determine the best place to set up your camera.
You are turning a 3-dimensional design into a 2-dimensional presentation, so make sure you do everything you can to choose the right approach.
Go ahead and throw out the “looking straight-on” approach because, while it might be useful in simply showing what a building looks like, it usually results in a dull and uninspired photograph.
Look online; you will see a trend of looking upward at skyscrapers and looking from aside upon lodges and cabins. The reasoning?
Skyscrapers convey authority; looking up at them elongates them and accentuates that attribute; lodges and cabins are more welcoming, hence a more casual angle of approach.
5. Consider Including People
Around buildings is where many base their lives. One thing you cannot capture in a model or blueprint of a building is how people ultimately interact with it.
Suppose you opt to include shots of crowds moving through halls, conversing with one another indoors, and passing by on their way to work. In that case, you can illustrate the fundamental value of architecture and make a statement of how people live in tandem with it every day.
This approach is instrumental in urban photography shots.
6. Choose an Appropriate Exposure
Understanding some general photography techniques and how they affect the outcome is a handy method in exercising control over your shots.
Generally, architecture is static. When in doubt, opt for a long exposure (don’t forget your tripod) to capture as much detail as possible.
There is generally no rush if there are no fast-moving subjects, so take the time to capture several shots at different exposure levels to capture as much dynamic range as you can.
Also, long exposures can be useful even if you do have fast-moving subjects; for example, a shot of a crowd of people moving through a shopping center will exhibit motion blur, illustrating a quick-paced society.
7. Select the Right Aperture
In many cases, a small aperture will be the most beneficial when your subject covers a large area, making it optimal for keeping large amounts of information in focus.
Understandably, a small aperture is typically going to be the go-to for architectural shots, but certainly not in all cases. Ask yourself – are you interested in the entire setting or a particular feature?
Maybe you want to focus on a single balcony protruding from the side of a hotel building; in this scenario, a larger aperture would help keep the one balcony in perfect focus while blurring the other parts of the building you are not interested in.
Consider your purpose.
8. Time it Right
If you are an architecture photography enthusiast, you probably have other things to do during the day than dropping everything at a specific moment when the lighting is just right (although professionals often do this).
However, you should certainly consider the ways in which weather and the sun’s position in the sky play a part in your shot. Early morning and sunset tend to provide the most interesting, complex, and colorful lighting.
If you can make the time before work, in the evening, or on a day off, head down to a local architectural marvel and make the shot then.
You will unlock new themes, such as restfulness, forlornness, and rejoice that are harder to capture at other points in the day.
9. Distance Yourself Appropriately
Do you want to fill the frame with the building, or do you want the building to occupy a smaller portion of the image so the viewer may take in the surroundings?
In a high-tech world, you may overlook the importance of moving your feet in making or breaking an image. Again, consider the outcome of the photograph and what you want it to convey.
Decide if the surroundings are relevant – if they are, back up and incorporate the horizon. If not, close in and let the building fill the frame if it seems appropriate.
Listen to your judgment and go where it tells you.
10. Use the Rule of Thirds
Imagine four lines: two vertical lines and two horizontal lines imposed over your shot, with nine sections like a tic-tac-toe board. Most modern cameras enable you to see this pattern in your viewfinder to make this easy.
If you are having trouble figuring out how to compose your shot, line up significant details with the lines and vertices to make the image automatically more interesting to viewers.
Once you become more adept at architecture photography, you can break this rule from time to time if your informed judgment suggests, but most of the time, you can’t go wrong with using it.
11. Invest in a Solid Camera Body
If you decide to get serious and purchase a dedicated digital camera, the body is going to be the thing that ultimately turns optical information into a stored image.
It is also the thing you will use to adjust settings and frame shots, so research is key to your satisfaction.
You may opt for a body with a full-frame sensor if you value the ultimate resolution for printing your photos. But in many cases, a crop sensor is practical for the majority of applications and is significantly more affordable.
These days, professional cameras (excluding film cameras for simplicity’s sake) generally come in two forms – DSLR (Digital Single Lens Reflex) and mirrorless.
The former option is the more traditional choice. DSLRs reflect shots to the viewfinder through a built-in mirror and tend to offer the widest variety of lenses with brands like Canon and Nikon.
The latter – mirrorless cameras – are comparatively lightweight thanks to their use of digital viewfinders, making them a more portable choice; as the saying goes, “The best camera is the one you have with you.”
12. Choose Good Lenses
There is an overwhelming selection of lenses on the market. However, since you have determined your niche to be architectural photography, you can narrow down these choices to avoid buying lenses you won’t use.
Depending on the type of architecture photography you are into (landscape, urban, interior), your ideal first lens might be different.
For landscape photography, a high-quality wide-angle lens will allow you to fit sprawling subjects into the frame.
For urban photography, tilt-shift lenses enable you to photograph tall subjects such as skyscrapers from a lower elevation without vertical distortion.
For interior photography, a quirky fisheye lens can provide a unique, semi-panoramic perspective.
Unfortunately, no one lens can do it all, so be prepared to purchase a few if you plan on switching things up.
13. Get a Tripod
You will need a tripod – the more solid the material, the better.
Carbon fiber tripods are the cream of the crop thanks to their unparalleled stability and lightweight, portable nature.
Aluminum tripods are a reliable, more affordable choice.
Ultimately, the purpose of investing in a high-quality tripod is to ensure that there is no movement during the long exposure times that are common in architecture photography.
14. Familiarize Yourself with Post-Processing Software
Digital post-processing has become an integral part of photography in recent years.
While you might opt to keep your images as “natural” as possible, you should not turn a blind eye to the added dimension of flexibility programs like Lightroom and Photoshop can provide.
Photoshop is not just about image manipulation but image enhancement. You can use a variety of editing programs to create layers and combine images to produce jaw-dropping high dynamic range (HDR), vivid color enhancements, and exposure manipulation for added contrast.
The purpose of using software is not to turn a photograph into something that it is not, but to draw out positive characteristics.
Also, sometimes errors happen.
You may have had a smear on your lens when you took some photos in D.C. and did not notice at the time; you are long gone, but thanks to your skills in imaging software, your work can be saved and made even more magnificent.
15. Plan to Travel
The best is saved for last.
The dream of architecture photography is the ability to explore cities and cultures around the world, view breath-taking architecture, and even get paid. If you plan to be a career architecture photographer, you can expect to be doing a lot of moving around.
Not everyone lives in places like Venice or New York City with beautiful buildings abound, so travel is not only helpful but often necessary to sustain an influx of exciting subjects.
It is what makes architecture so fascinating – the wide variety of styles, the variation from region to region, and the cultural experiences they provide.
Finally
Photography is a broad topic.
It can illustrate so many concepts and emotions in a hard-hitting way that not only enables the interpretive pleasures of the viewer but the personal intimacy between the photographer and his or her subject.
Architecture photography enables you to connect with the types of designs you admire by allowing you to physically approach them and capture the very light they emit into your camera’s sensor, all while basking, if only briefly, in the culture these buildings reflect.
Whether you pursue it as a hobby or a professional occupation, there are a plethora of benefits you can gain from this endearing endeavor.
Artful photographs draw emotions and involve high levels of creativity, inspiration, and planning – crucial skills that emphasize the importance of photography in architecture.